Last week, my neighbor shelled out over $200 to swap out an oxygen sensor that didn’t even need replacing.
His check engine light popped on, so he took the car to a shop. They plugged in the scanner, found an O2 sensor code, and immediately recommended a new part. Nobody bothered to see if the sensor was just dirty. Two days after the repair? The light came back on.
Here’s something most drivers never hear: an oxygen sensor code doesn’t always mean there’s anything wrong with the sensor itself. Sometimes carbon, oil residue, or fuel deposits build up on the tip, messing with the readings and fooling your car’s computer. The sensor gets the blame even if it’s still kicking. A lot of times, you can just clean that sensor for next to nothing instead of buying a whole new one.
A dirty oxygen sensor likes to show itself with:
- A check engine light that keeps coming back
- Worse gas mileage than usual
- Your engine idling rough or hesitating
- Failing an emissions test
If any of that sounds familiar, don’t rush out for a replacement yet. I’ll walk you through five simple ways to clean an oxygen sensor—some you can even do without taking it out. Most of these tricks barely cost anything, and you won’t need a mechanic. I’ll also show you how to tell if your sensor’s just dirty or truly worn out, because not every problem can be fixed with a good cleaning.
One quick thing: exhaust parts get really hot, so always give your engine time to cool off first. All right, let’s dive in.
I’ll also help you figure out if your sensor’s just dirty or if it’s actually worn out, because cleaning doesn’t solve everything. I’d rather be straight with you—no sense wasting your time if you really do need a new one. One quick warning: exhaust parts get super hot, so always let your engine cool off first.
Stick around, and next time your check engine light comes on, you’ll know exactly what to check before handing over your money.
Trick Number 5, start with a full heat cycle drive
Before you grab a bottle of cleaner or some fancy additive, try this: take your car for a proper highway drive. Seriously, it’s free—just costs you a bit of gas and maybe twenty minutes.
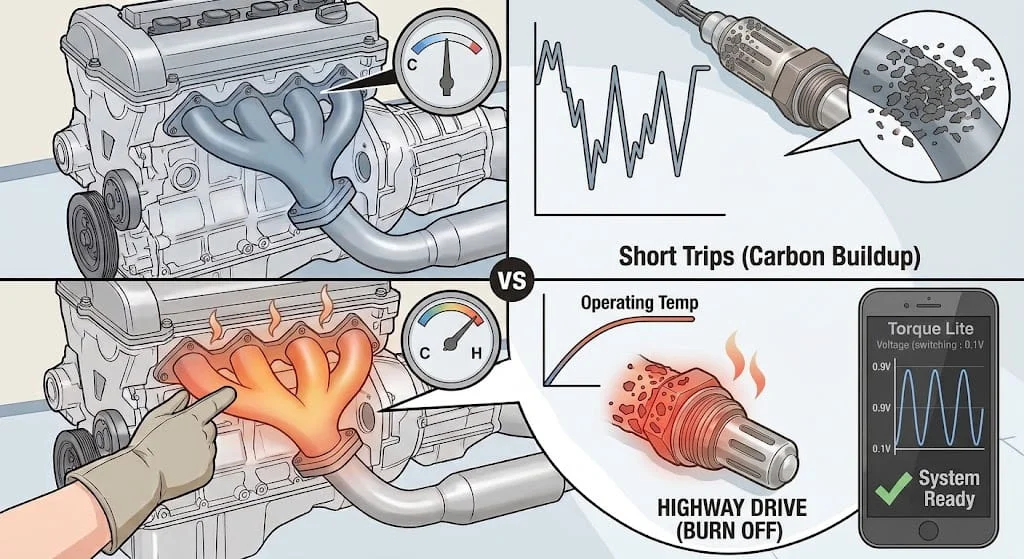
Short trips just don’t let your engine heat up like it should. Every time you turn it off while it’s still cold, a tiny bit of carbon sneaks onto the tip of the oxygen sensor. Do that day after day, and suddenly there’s a buildup slowing the sensor down and giving weird readings—even though the sensor isn’t actually bad.
The easy fix? Get out on the highway and let your car stretch its legs. You need a good, long, steady drive to really heat up the exhaust and burn that gunk away. Here’s all you have to do:
Start by warming up your engine—just drive like normal for about ten or fifteen minutes until the temperature needle settles where it usually does.
Pick a stretch of open road where you won’t have to keep hitting the brakes. Steady is the goal.
Keep your RPM between 2,500 and 3,500 for fifteen to twenty minutes. No need to race or floor it—just smooth, steady pressure on the pedal. And obviously, don’t break any speed limits.
Want to see if it worked? If you have an OBD2 Bluetooth adapter and a free app like Torque Lite, you can actually watch your oxygen sensor’s live voltage. A healthy sensor will flip quickly back and forth between about 0.1 and 0.9 volts. If you see that happening, you’re in good shape. How did you like this guide on the 5 easy ways to clean your oxygen sensor?
Just a heads up—this doesn’t always do the trick. If things still look off or that check engine light pops back on, the carbon might be too stubborn for just a drive to clean up. That’s when you’ll need to move on to the next step.
Trick number 4, premium fuel plus detergent fuel cycle
Look, I’m not saying you need to switch to premium gas overnight. Honestly, most cars don’t need it at all. Unless you’ve got a turbocharged engine, drive something sporty, or your manual actually calls for high-octane, just stick with regular gas. If your car isn’t in that group, this isn’t something you should do all the time.
But here’s the thing: sometimes this little trick helps when oxygen sensors get dirty. Some premium fuels have better detergents mixed in—those additives clean up fuel injectors and cut down carbon buildup inside your engine. A cleaner burn means cleaner exhaust, which carries less soot to clog up the oxygen sensor.
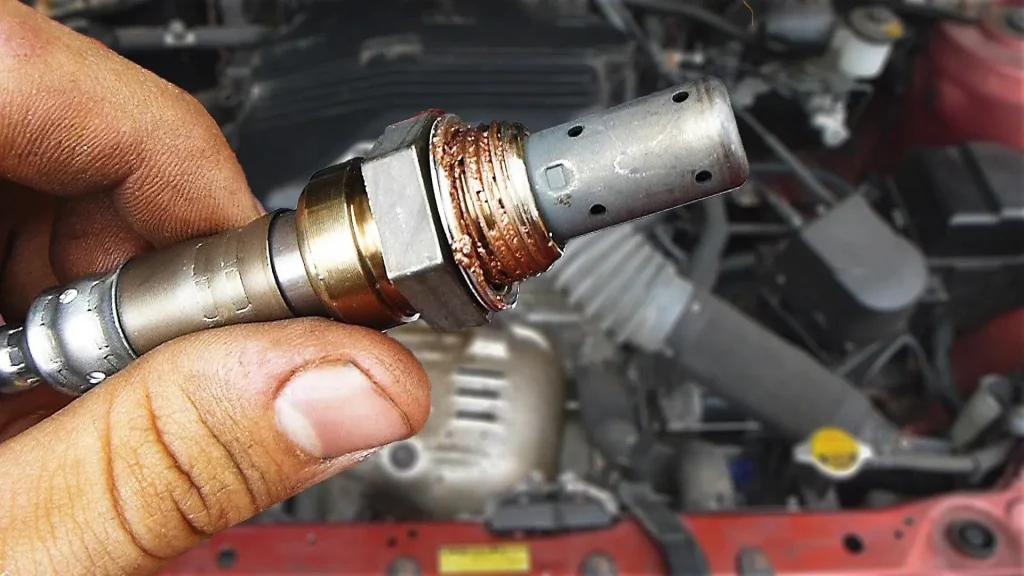
I’ve noticed this working mostly on older cars, especially ones that have survived years of cheap gas or lots of short drives. Here’s what I’d do:
Let your tank get nearly empty.
Fill up with a reputable premium fuel—pick a top-tier station. (By the way, I already made a guide to which stations actually sell good fuel;
Hit the highway for a good, long drive, so the engine stays hot.
It’s not really the higher octane that does the trick—it’s the detergent chemicals, and the steady heat helps them work. That mix can clean up some light carbon gunk from around your oxygen sensor and exhaust.
But don’t waste your money if your engine’s knocking, burning oil, misfiring, or if you’ve already got a dead oxygen sensor. Premium fuel isn’t going to magically cure those. And sometimes, the real issue is hiding somewhere you’d never expect.
Did you already know about any of these 5 easy ways to clean your oxygen sensor?
Trick number 3, clean the mass air flow sensor
This trick ties straight into the rich fuel mixture issue—one dirty sensor can make another one dirty, too. And honestly, the mass air flow sensor (MAF sensor) is often the real culprit.
Here’s what the MAF does: it measures how much air your engine’s pulling in. The car’s computer checks that reading to figure out how much fuel to send through the injectors. But when the MAF sensor gets filthy, its readings get all messed up, and the engine starts acting weird. Sometimes, it reports less air than there actually is, so the computer thinks it needs to inject more fuel. That’s how you end up with a rich mixture. More fuel leads to more soot in the exhaust, which eventually coats the oxygen sensor in gunk.
I’ve seen people swap out oxygen sensors, thinking they’d solved the problem, when really, the MAF sensor just needed to be cleaned. The upside? Cleaning it is usually a breeze. Here’s what you do:
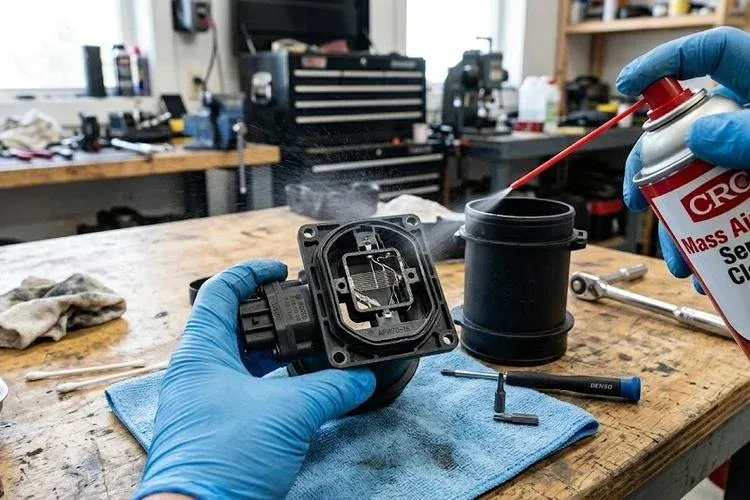
First, disconnect the battery or unplug the sensor.
Look for the MAF sensor near your air filter box. It’s usually held with a couple of screws.
Take it out, but don’t touch those tiny wires inside—they’re super fragile.
Only use a proper MAF sensor cleaner spray. Never use brake or carb cleaner, or you’ll ruin the sensor.
Spray the wires gently a few times.
Have you tried any of these 5 easy ways to clean your oxygen sensor on your own car?
Let everything air dry before putting it back.
On older cars, this simple cleaning can work wonders. The idle smooths out, the throttle feels snappier, and your fuel economy picks up almost right away. With the air-fuel ratio back to normal, the oxygen sensor finally gets a break from all that extra carbon.
Here’s the thing: even if your engine seems fine, a dirty MAF sensor can quietly start this whole cycle again. So keep an eye on it.
Trick number 2, water mist steam decarbonization
This trick goes way back—mechanics have been using it forever and it’s often called water decarbonization. Here’s the gist: you let a tiny bit of water into a fully warmed-up engine, and it instantly flashes into steam right there in the combustion chamber. That quick burst of steam can help shake loose some of the lighter carbon deposits that tend to build up on parts like the valves, the tops of the pistons, and sometimes even in the exhaust. When those bits of carbon break free, a lot of them get blown out through the exhaust. That can clean up some of the gunk around your oxygen sensor, too.
Here’s the usual way to do it safely:

First, get the engine warm and let it idle. Next, mist a little water—just a fine spray—into the intake air stream, nice and slow. Don’t dump it in; go gently. The last thing you want is a hydrolocked engine. As the water does its thing, you might hear the engine’s sound change for a second, or maybe it’ll start running a little smoother as the carbon gets burned off.
But seriously—too much water is begging for a blown engine. If you’re at all unsure, just leave this alone or hand it off to a pro.
Worth knowing: this only helps with light carbon buildup. It won’t fix a banged-up or oil-fouled oxygen sensor.
And sometimes, the real issue isn’t even mechanical anymore. Sometimes, it’s just the car’s computer hanging onto old habits.
Trick number 1, fuel system carbon burnoff cycle drive best method
If I’m working on an old car with a lot of miles and I want to try everything before swapping out the oxygen sensor, this is usually my last-ditch method. It’s not just a single trick—it’s really a combo of everything that helps burn off carbon inside the exhaust system. I like to call it the carbon burnoff cycle.
Which of the 5 easy ways to clean your oxygen sensor worked best for you?
This really helps if your car spends most days doing short trips, idling in traffic, or making constant delivery runs. That kind of driving slowly packs the exhaust with carbon deposits, making things run rough.
Now, before you try any of this, check a few basics: make sure the oil level’s where it should be, coolant temp is normal, the engine isn’t misfiring, and the car’s safe to drive a little harder than usual.
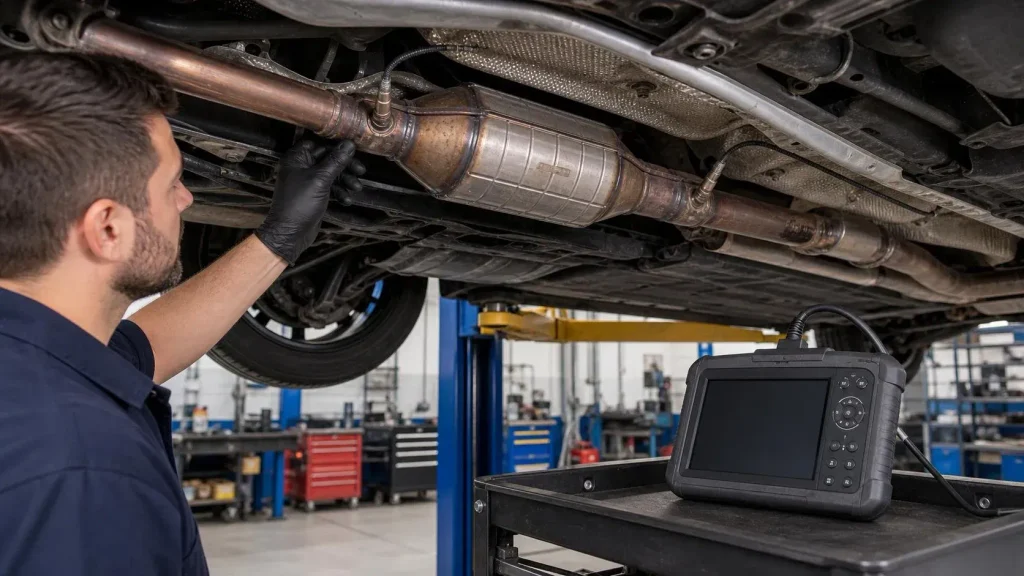
Ready? Here’s what you do:
Pour some fuel system cleaner into a mostly empty gas tank—about a quarter tank is best.
Warm up the engine fully, then take the car out for a long stretch on the highway.
When everything’s at operating temperature, keep the RPMs a bit higher than normal—not redlining, but enough to get the exhaust really hot—usually cruising at 2,500 to 3,500 RPM.
Every so often, give it a few solid accelerations (obviously, stay within the speed limit) to really push some air through the system.

The main idea here is simple: more heat and more airflow. That combo helps burn up and blow out the carbon that’s been building up everywhere—from the combustion chamber all the way down to the catalytic converter and oxygen sensor. On older engines, you can sometimes feel it after: acceleration feels smoother, throttle response gets sharper, maybe even a little bump in fuel economy.
But here’s the truth: this only does the trick if your oxygen sensor still has some life left under the gunk. If the sensor’s cracked, soaked in oil, contaminated with coolant, or just worn out from old age, no amount of spirited driving is going to revive it. Then, replacing it is really your only option.
So, if you’ve tried all of this and nothing’s changed, you can stop chasing carbon buildup—it’s not about cleaning anymore. The sensor’s just done, and it’s time for a new one.
Which of the 5 easy ways to clean your oxygen sensor would you try first?
Replacing an oxygen sensor
isn’t nearly as complicated as people make it out to be. Here’s what you do:
First, give the exhaust plenty of time to cool off. Trust me, that thing gets insanely hot, and the sensor bolts right into it. Once it’s cool, track down the sensor itself—most cars have one before the catalytic converter and another after it.
Unplug the sensor’s electrical connector, being careful not to yank on the wires. Grab an actual oxygen sensor socket for the job. Regular wrenches just don’t cut it. They can slip and mess up the sensor, but the special socket fits right around the wire.
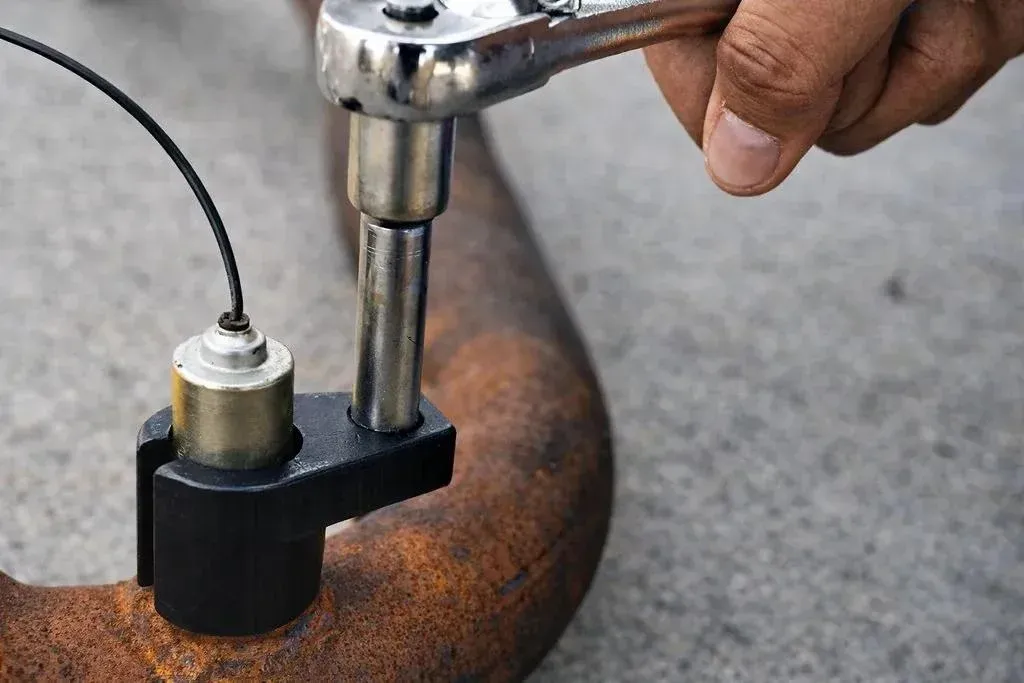
If the sensor doesn’t want to budge, hit it with a shot of penetrating oil around the threads and wait a few minutes. Then, try again—usually, it’ll loosen up. Pull out the old sensor and double-check that the new one matches: same connector, same thread.
Most new sensors come pre-coated with anti-seize on the threads—don’t overdo it by adding more. Screw in the new sensor, tighten it snug, then plug in the wiring. Fire up the car.
Sometimes the check engine light goes out right away. Sometimes, the car needs a few drives to reset things. If the old sensor was clogged or worn out, you’ll probably notice a smoother idle, better acceleration, and maybe even a bump in fuel economy.
But here’s something most people overlook: swapping the oxygen sensor doesn’t always fix everything. Other sensors, like the airflow meter or throttle position sensor, can mess with fuel economy and drivability too. People don’t usually clean these, and they matter. Check those out before throwing more new parts into your car.
Was your check engine light fixed after trying these 5 easy ways to clean your oxygen sensor?
A dirty oxygen sensor doesn’t always mean a dead one. As we’ve seen, carbon buildup from short trips, a rich fuel mixture, or even a dirty MAF sensor can make a healthy sensor look like it has failed. That’s why it’s worth trying these 5 easy ways to clean your oxygen sensor before spending money on a replacement:
- start with a full heat cycle drive
- premium fuel plus detergent fuel cycle
- clean the mass air flow sensor
- water mist steam decarbonization
- fuel system carbon burnoff cycle drive best method
Start with the simplest and cheapest methods first, and work your way down the list. If the sensor is cracked, oil soaked, coolant contaminated, or simply worn out from age, no cleaning trick will bring it back. At that point, replacing it is the right call, and as you saw above, it’s a job many people can do at home with the right socket and a little patience.
I hope this guide saves you time and money. If one of these methods worked for you, or if you’re still stuck with that check engine light, leave a comment below and tell me what happened. I read every comment.
Stay safe, and happy driving!
Hi, I’m Mike, the person behind CarCareHubs.
I started CarCareHubs to share simple, practical car maintenance tips in plain language, without the confusing jargon or the pressure to spend money on parts you may not need. Whether it’s a dirty sensor, a check engine light, or everyday upkeep, my goal is to help you understand what’s going on with your car before you head to the shop.
Everything you read here comes from my own hands-on experience, research, and testing. I also run the Car Care Hub YouTube channel, where I share step-by-step videos on the same topics you’ll find on this blog. If you prefer watching over reading, come say hi there too Carcarehub
Disclaimer
The information on CarCareHubs is shared for general educational purposes only. I’m not a licensed mechanic, and this content isn’t a substitute for professional advice. Every vehicle is different, so results may vary, and the methods in this post may not work for every car or every sensor.
Car repairs and maintenance involve risks, including hot exhaust components, chemicals, and moving parts. Always let your engine cool down before working on it, follow your vehicle’s owner’s manual, wear proper safety gear, and obey all traffic laws and speed limits when driving. If you’re not comfortable doing a task yourself, please consult a qualified mechanic.
CarCareHubs and its author are not responsible for any damage, injury, or loss that may result from using the information on this website. You follow any advice here at your own risk.