Most people drive for years without picking up a few basic tricks that make owning a car way easier—and a lot cheaper too. These hacks aren’t locked away in some mechanic’s toolbox. They’re just practical, simple shortcuts that nobody really talks about, and honestly, most folks probably never bother looking up. It’s wild how much money these can save. Take everyday stuff like a dull headlight, a foggy windshield, or a small dent. People rush off to the repair shop,
and suddenly what seemed minor turns into a big bill. But often, with a little know-how and a few supplies you likely have lying around at home, you can fix it yourself. That’s actually why I put together a video showing 15 of the best car tips I’ve found. Here,
I’m sharing the top 5—the easiest ones you can try right away. You won’t need any special tools, and they’re worth your time and money. Whether you’re just starting out, you drive every day, or you simply want your car to last, these maintenance tips help you dodge unnecessary repairs, protect your ride, and make you feel a whole lot more confident behind the wheel. One quick heads up before we dive in: always check your car’s manual and use a bit of common sense, since every vehicle’s different. Alright, let’s jump right into the first hack.
Tip #1: Use Vaseline for a Clean, Glossy Tire Shine
You pull up to your place, step out, and spot your tires looking tired—kind of ashy, dull, that weird faded brown thing nobody likes. Doesn’t matter how clean your paint is, those ugly tires just make the whole car look older than it really is. Annoying, right? But—get this—the cheap fix is probably hanging out in your medicine cabinet: plain ol’ petroleum jelly, aka Vaseline.
No joke. Big-name tire shines? Lots of ‘em are basically fancy petroleum jelly with a label and a price tag. This DIY version nails the same deep, black finish and costs, like, what… a couple bucks a year?
Here’s how you do it: First, actually clean your tires. Get all the road funk and soap scum off and let ‘em dry, or else the jelly just slides around and looks gross. Scoop out a dab of Vaseline onto a rag—microfiber’s best, but use what you got. You seriously don’t need a lot. Work it into the sidewalls using little circles, kind of like you’re putting moisturizer on your face except, you know, it’s tires. Grab another clean cloth and buff it out till the tire’s satiny, not greasy. Touch it. If your fingers aren’t slippery, you did it right. So what’s the deal? Petroleum jelly soaks right in,
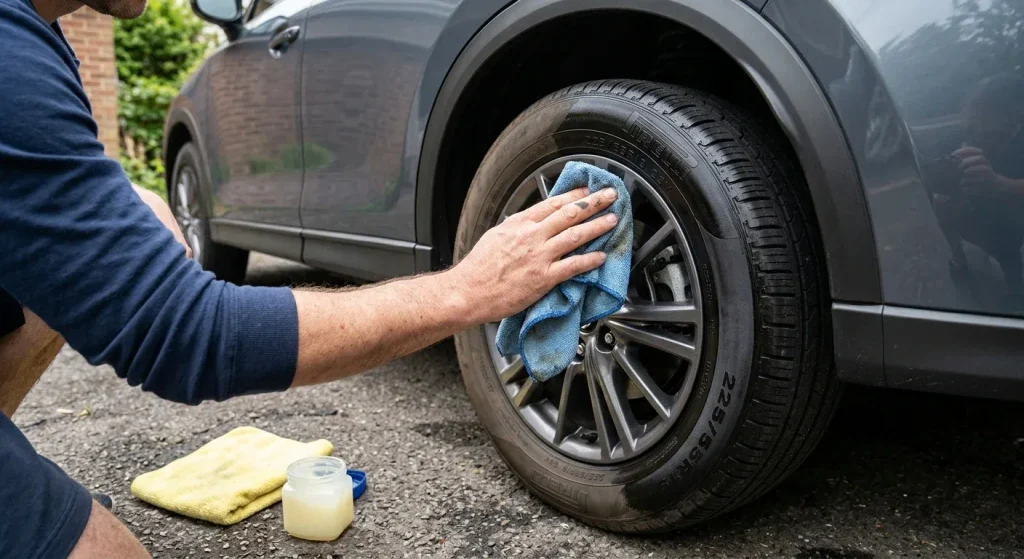
brings back that dark, new-rubber vibe, and leaves a shield to keep the sun from turning your tires all cracked and crusty. It holds up for a couple weeks most times—unless you’re driving in a monsoon or power-washing your wheels like a maniac. What do you think of these brilliant car hacks so far?
Quick heads-up, though: NEVER, and I mean never, put the jelly on the tread (the part that touches the road) or near your brakes. That’s asking for trouble. Just stick to the sidewalls and wipe off any extra so nothing flings up onto your paint. Money-wise, Vaseline’s a steal—a tiny jar lasts ages and must do dozens of shine jobs. Meanwhile, store-bought tire gel? You’re paying a lot more for not much extra wow. Honestly, takes five minutes, gives your ride an instant facelift, and saves you cash for the fun stuff. And if you’re into cheap car hacks, wait till you see what’s next…
Tip #2: Find the Hidden Backup Key Inside Your Key Fob
So, imagine you’re stuck in some dim parking lot late at night, jabbing your key fob like you’re trying to wake it up, and nothing happens. No lights flash. Not a single beep. Just dead silence. Your fob’s battery is officially done, and you’re already picturing an expensive call to a locksmith. But wait—don’t freak out just yet. A lot of folks don’t realize that most modern key fobs hide a mechanical key right inside them. Seriously, it’s one of those “duh” features you only discover after the fact.
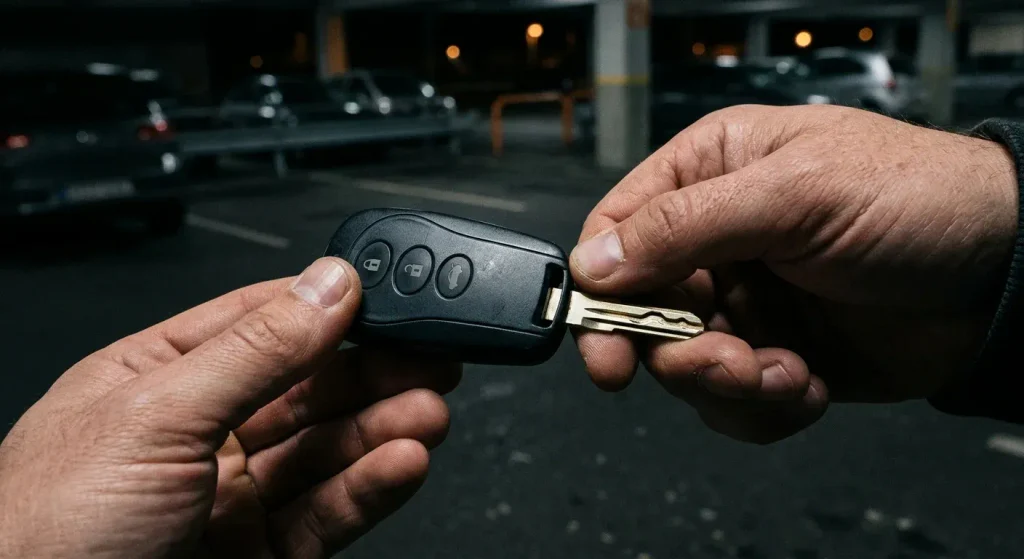
Here’s what you do: Start by checking your fob for a small latch or button—usually on the side or back. Sometimes it’s a slider, sometimes it’s a little button you press. Hold the latch and pull—the metal key should slide out pretty easily. Take a look at your car door. You’ll probably spot a plastic cover over the keyhole next to the handle. Use the tip of the key to pop that cover off. Now just stick the key in the slot, turn it, and you’re in. No drama. Did you already know any of these brilliant car hacks before reading this post?
So why do car makers bother with this old-school feature? Simple. It’s for the exact moment your fancy electronics let you down. No batteries, no tech headaches—just a trusty backup. What about actually starting the car? Unlocking the door is step one, but for push-button start cars, you can usually get the engine going by holding the dead fob right up to the button, or placing it in a specific spot near the steering wheel. Your owner’s manual will have the details.
Honestly, it’s smarter to swap out the battery before it leaves you stranded. Most fobs just use cheap coin batteries you can change yourself. If you notice your fob getting slower or you need to press a button a few times to lock or unlock, spend three bucks and fix it early. Go ahead—grab your fob and check for that hidden key while you’re home and not stressed. A few seconds now can save you a lot of trouble at the worst possible time. These little tricks are easy to miss, but they make life so much simpler. The next hack is even better.
Tip #3 : ToothPaste For Surface Scratch Removal
You head back to your car and notice a thin, shallow scratch stretching across your windshield. It’s not cracked or chipped, but no matter which way the sun hits it, that scratch keeps grabbing your attention and driving gets annoying fast. The first thought is to call in a pro, but honestly, that feels expensive for something so minor. For light surface scratches like this, you can actually try a simple fix at home: regular white toothpaste. The stuff has gentle abrasives that can polish glass and help hide faint marks.
Which of these brilliant car hacks are you going to try first on your own car?
Here’s what you do: Start by cleaning and drying the windshield really well. You don’t want dirt making things worse. Pick a classic, opaque white toothpaste—not the gels, charcoal, or whitening ones. Put a small dab right on the scratch. Take a soft microfiber cloth and gently rub in little circles for a minute or two. Let it sit for a few moments, then wipe it off with a damp cloth.
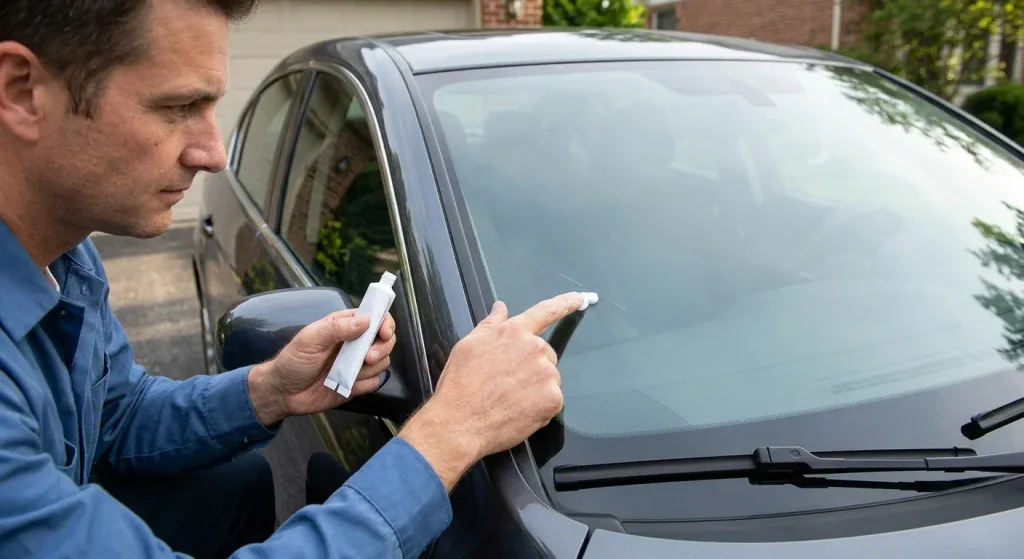
Check the scratch in good light. If it’s still there, try one or two more rounds. Why does this work? The fine grit in toothpaste buffs the glass just enough to smooth out shallow scratches. This way, they catch less light and become much less noticeable.
But don’t push your luck. Run your fingernail over the scratch. If your nail catches, it’s too deep for toothpaste—time to get a polishing kit or call a pro. Toothpaste also won’t help with chips, cracks, or damage inside the windshield. A quick safety heads-up: Keep the toothpaste off your paint, rubber, and plastic trim, and don’t scrub hard or stay on one spot too long.
You don’t want to end up with a dull patch. Try it on a small spot first, then clean the whole area when you’re done. Toothpaste is cheap, so honestly, there’s nothing to lose trying this before shelling out for a repair. It takes maybe five minutes, requires no special tools, and might save you some cash. Next up, let’s talk about something even more important—making sure you stay safe out there on the road. Have you ever saved money on car care with a simple trick like these brilliant car hacks?
TIP #4: Soften a Dry, Rough Steering Wheel with Petroleum Jelly
You grab your steering wheel, and yeah, it just feels old. It’s rough, kind of dry, maybe even stiff. No matter how much you scrub it, the leather or vinyl still looks faded and tired. And sure, you could drop some serious cash on a pro detail, but those interior treatments aren’t cheap. So it makes sense to look for something easy and affordable.
Here’s one trick you can try: petroleum jelly. You don’t need much—just a little dab will do it. It’s not going to erase deep cracks or magically fix everything, but it does soften the surface and helps bring back some life. For a couple bucks, it’s a pretty decent fix if your wheel just feels dried out.
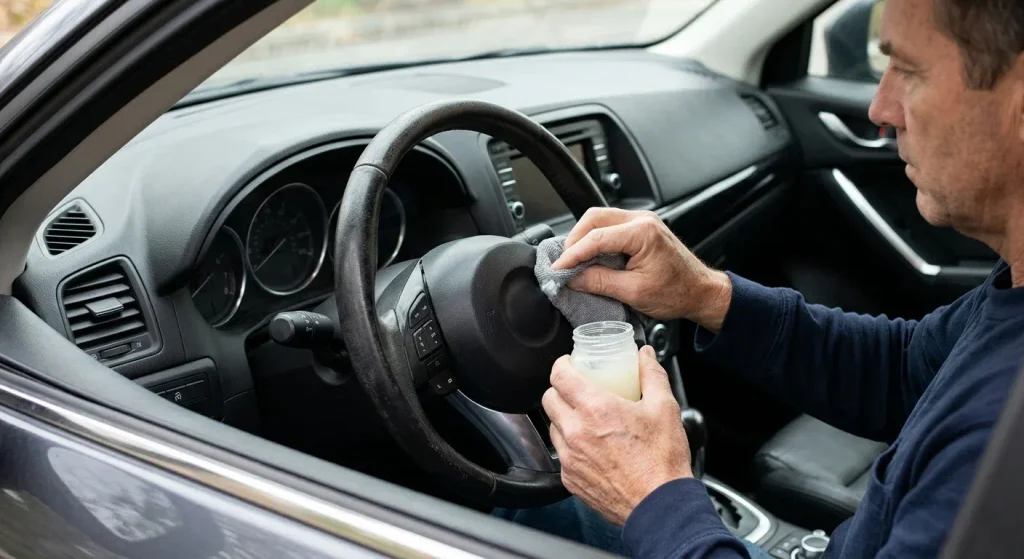
Here’s how you do it: Start by cleaning the wheel. Wipe it down with a damp microfiber cloth and let it dry completely. Test a hidden spot first, just in case—sometimes it can darken the material or leave a weird mark. If things look fine, grab a soft cloth and gently rub a super thin layer of petroleum jelly over the wheel, focusing on the rough or textured spots.
Let it sit for a few minutes. Then take a clean dry cloth and buff it out really well—keep going until it feels dry and definitely not slippery. Why does this work? Petroleum jelly is like moisturizer for vinyl and some leathers. It softens up that dried-out material and leaves behind a light barrier, so the dryness isn’t so obvious. It won’t fix major cracks or peeling though—you’ll need a real repair for that.
One thing you really need to watch out for: a slippery steering wheel is a recipe for trouble. You don’t want your hands sliding around. So only use a thin layer, keep buffing until there’s zero greasy feel, and if it’s still slick, wipe it down with a little soapy water and dry it off. Make sure you get a solid grip before you hit the road. And honestly, if your wheel’s got deep cracks, peeling, or the leather is shot, it’s time to think about a proper fix or just getting it rewrapped. Do you know any other brilliant car hacks that most drivers have never heard of?
If it’s real leather, you’re way better off with a proper leather conditioner—petroleum jelly can actually leave it kind of sticky or oily over time. But if you just need a quick refresh and your wheel isn’t totally gone, a tiny bit of petroleum jelly costs basically nothing compared to a full detail. Buff it in well, and your steering wheel feels a lot better—at least for a while. Stick around, because there’s another money-saving car fix coming up next.
Tip #5: Clean Corroded Battery Terminals at Home
You pop the hood, and bam—your battery terminals are covered in nasty white or bluish gunk. If corrosion gets bad enough, it can mess with your car’s electrical connection, making your engine slow to start… or refusing to start at all. Before you shell out for a new battery or pay a mechanic, you should know this problem is usually easy to fix yourself.
That buildup is really just dried acid residue, and you can wipe it off with stuff you probably already have at home. Some folks swear by pouring cola over the terminals, and honestly, it works for light corrosion. But baking soda mixed with water is safer and cleans better without leaving a sticky mess.
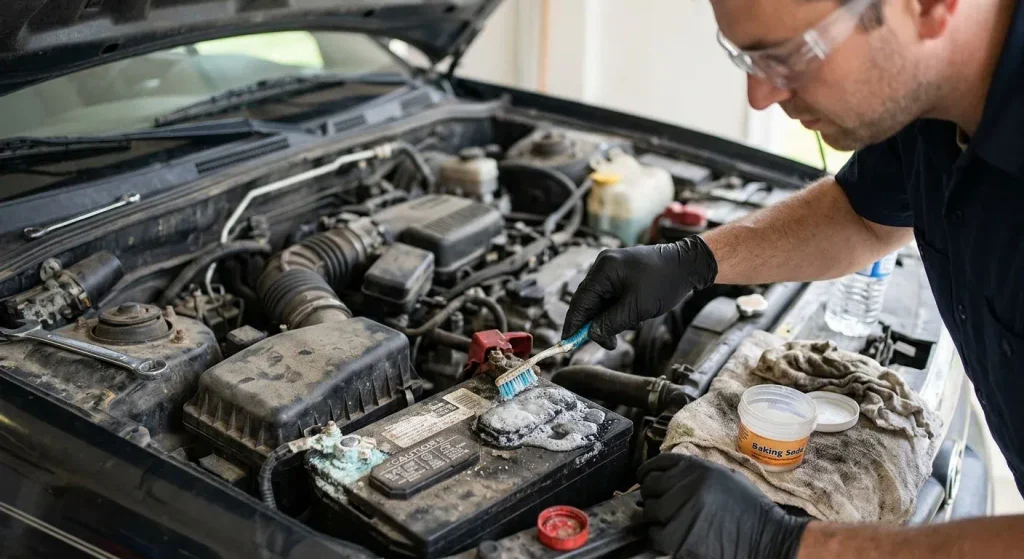
Here’s what you need: Safety gloves, eye protection, an old toothbrush, a clean rag, baking soda, some water, and a wrench. Here’s how you do it: First, make sure the engine’s off and the key’s out. Suit up with gloves and eye protection—battery acid stings and can hurt your eyes. Loosen and pull off the negative (black) terminal first, then the positive (red) one. This keeps you safe from sparks. Make your cleaning paste: mix a tablespoon of baking soda into a cup of warm water. Which car problem do you wish more brilliant car hacks covered?
Cola works if you’ve got only a little corrosion, but it’s sticky and you need to rinse extra well after. Dab your paste onto the terminals and clamps. It’ll fizz and bubble as it eats away the junk. Grab the toothbrush and scrub gently for a minute or two. Rinse everything off with clean water, but don’t splash it onto other engine parts. Dry it all super well with your rag. Reconnect the positive terminal first, then the negative. Tighten both clamps so they’re snug.
Why does this even work? Baking soda neutralizes the battery acid (that’s what the bubbling’s about), and cola’s mild acids help dissolve lighter corrosion—but sugar attracts dirt, so you definitely need to wash it off. Safety check: Never let your cleaning solution drip into the battery cells, and never let any metal tool touch both terminals at once. If you see cracks, leaks, or swelling in the battery—don’t try to fix it. Let a pro handle it. Don’t expect miracles:
Cleaning only solves problems caused by corrosion. If your car still struggles to start, the battery could just be old. Batteries usually last about three to five years, so get it tested at an auto parts store (most places do it for free). Want to keep corrosion from coming back? Dab a tiny bit of petroleum jelly or use a terminal protector spray once the terminals are dry.
Cost-wise, baking soda is dirt cheap compared to a mechanic visit or a new battery. So cleaning them up is always worth a shot. You might be surprised—clean terminals really can make your car kick right into gear. The next trick is just as easy and can save you even more cash.
Listen, you don’t have to drop a fortune every time your car acts up. Little hacks go a long way—seriously. Smear some petroleum jelly on your tires and suddenly they look fresh from the showroom. Got a key fob that decided to quit? There’s usually a sneaky backup key hidden somewhere, just gotta poke around for it. If your windshield’s got those annoying tiny scratches, who knew, but toothpaste actually buffs them out pretty well. Battery looking gross? Baking soda nukes that corrosion before it turns into a headache.
The main thing? Learn your car’s quirks. Try cheap fixes first, as long as they’re safe. If you’re staring at some epic scratch, a battery on its last gasp, or your steering wheel is splitting like the Red Sea—yeah, time to ditch the DIY and call in someone who knows what they’re doing. Safety’s the real winner here. Anyway, find the trick that bugs you the least, test it on a not-so-visible spot, and see if it does the trick. Most of these little moves take, what, five minutes max? And they cost next to nothing. Seriously, why not try ‘em before handing your wallet over at the repair shop?
Oh, and if any of these tips worked for you, do someone a solid and pass it on. If you tried something weird and it actually worked, let me know in the comments—I live for that stuff. Want more car hacks? Stick around at Car Care Hub. It’s worth it, promise.
Hey, I’m Mike—the guy behind Car Care Hub.
I’ve been messing with cars for about 15 years now. Most of what I’ve learned? It honestly came from making mistakes and then figuring out how to fix them. Way too many late nights in the garage, just messing around and trying things out. After a while, I realized a lot of folks end up paying for repairs or services they could handle themselves—if only someone broke it down in plain English.
So I started the Car Care Hub YouTube channel and built this site. It’s a one-man show over here. My whole aim is simple: I want to share car tips, maintenance tricks, and money-saving ideas that actually help, whether you’re brand new to all this or you’ve been under the hood for years.Everything you read here is either from my own hands-on experience or research I’ve done along the way. I try to keep it straight-up and genuinely helpful.If you have a question, or some advice of your own, drop it in the comments. I’d really like to hear what you think.
Thanks for stopping by, and enjoy the ride!
Disclaimer
Hey! Just so you know, everything you read on Car Care Hub is meant for general knowledge and learning. I’m just sharing what I’ve learned from my own experience and research, but it’s not a substitute for advice from a real mechanic or safety professional. Every car’s different, so before you try any tips from this site, take a look at your owner’s manual first, and maybe test things out in a spot you can’t see. Something that works great for one car might not work for yours—it really all depends on the make, model, how old it is, and what shape it’s in.
Some of the stuff I talk about covers important parts, like your tires, steering, or the battery. Messing up or skipping steps with these can cause real problems. Always use the right safety gear, and if you’re unsure about something, it’s smarter to check with a professional. I can’t take responsibility for any damage, injuries, losses, or costs that come from using info you find here.
If you try any of these tips, you’re taking that risk yourself. Any prices or comparisons mentioned are just rough estimates—they can change a lot depending on your area or what’s happening in the market. There are a few links to other websites here and there; they’re just for your convenience. I can’t control or guarantee what’s on those sites. If you have questions about this disclaimer, just head to the Contact page and get in touch!