Take a real look at your car—not just that half-second glance on your way out, but an honest stare. Notice anything? Maybe the paint looks a little dull. Maybe you spot faint scratches sparkling when the sun hits just right. Does your car look older than it should? If that sounds familiar, you’re not alone. Tons of drivers settle for a ride that looks way more beaten up than it really is. And honestly, that mistake can bleed thousands from your wallet when it’s finally time to sell. Buyers size up a car in seconds, and if yours looks worn out, they’ve already moved on.
The good news? You don’t need some pricey detail shop to bring back that showroom glow. There’s an easy trick—seriously, it’ll run you about five bucks—and your car can look almost new again. Way shinier than you’d expect, too. Professional detailers usually keep tricks like this to themselves because, let’s be real, it’s how they pay the bills. That’s why I put together these six simple ways to make your car look brand new. I pulled them straight from my full-length video, and you can pull them off at home this weekend. No fancy equipment, no special training, and no big spending required.
And don’t skip the end, because trick number one is my top pick. It’ll protect your paint and wipe out those pesky scratches—with something you probably already have at home. Alright, let’s start from the top with trick number 6
Trick #6: Use Silicone Spray to Make Faded Trim Look Brand New
Let’s kick things off with one of the quickest ways to make your car look almost new again—and honestly, you’ll spend just a few minutes on it. Take a look at the plastic trim, rubber seals, and bumper covers around your car. Do they seem faded, chalky, or just kind of blah? That’s just years of sunlight wearing things down. UV rays slowly eat away at plastic and rubber, and it doesn’t matter how well you keep your car clean—worn-out trim makes any car look older. Here’s where an ordinary can of silicone spray steps in.
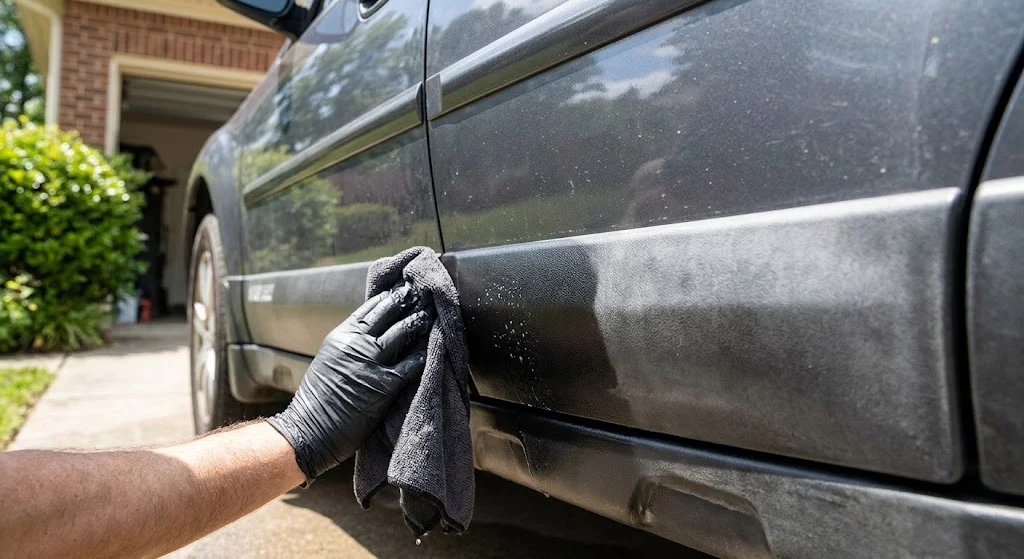
Here’s what you do: First, clean those areas. Wipe off any dust and dirt—no one wants to grind grit into their trim. Spray a bit of silicone spray on a clean microfiber cloth. You can spray it right onto the trim if you want, but using a cloth gives you more control. Wipe the faded spots with smooth, even strokes. Hit all the plastic trim, bumper covers, rubber seals, and moldings. Flip to a dry part of the cloth and buff lightly to even out the shine and catch any extra spray.
Why this works: UV rays create tiny cracks on the surface of plastic and rubber, so they start to look gray and ashy. Silicone spray fills in those little gaps and brings back a deep, uniform finish—suddenly your trim looks close to new again.
Here’s a bonus a lot of people miss: Silicone spray doesn’t just make stuff look better. It lubricates door seals and weather stripping, too. That keeps them from sticking, drying out, or cracking, and it can actually cut down on wind noise inside the car at highway speeds. So, just one quick step and you get better-looking trim and healthier seals all at once. A few quick tips:
Don’t get silicone spray on your tires, steering wheel, pedals, or glass—it’ll make them slippery. Test it in a hidden spot first, just to be sure you like how it looks. If you get any on your paint, wipe it off right away. Ready for the next trick? This one’s a game-changer that most people have never even heard of…
Trick #5: Clean Foggy Car Windows with Cornstarch
Here’s a super simple trick to make your car’s windows look crystal clear—plus, it only costs about two bucks. Ever notice a greasy, cloudy film building up inside your windshield? With time, it gets worse. At night, headlights from other cars scatter across that mess and make driving way harder (and less safe). Regular glass cleaner barely helps—it just moves the grime around. Cornstarch is your secret weapon.
Here’s what to do: Lightly dampen a microfiber cloth, then sprinkle a bit of cornstarch on it. Wipe the windshield in firm, overlapping circles. Tackle one area at a time till you’ve done the whole thing. Grab a clean, damp cloth and wipe off any leftover powder. Give it a quick buff with a dry part of the cloth, and boom—totally clear glass. Why does this work?
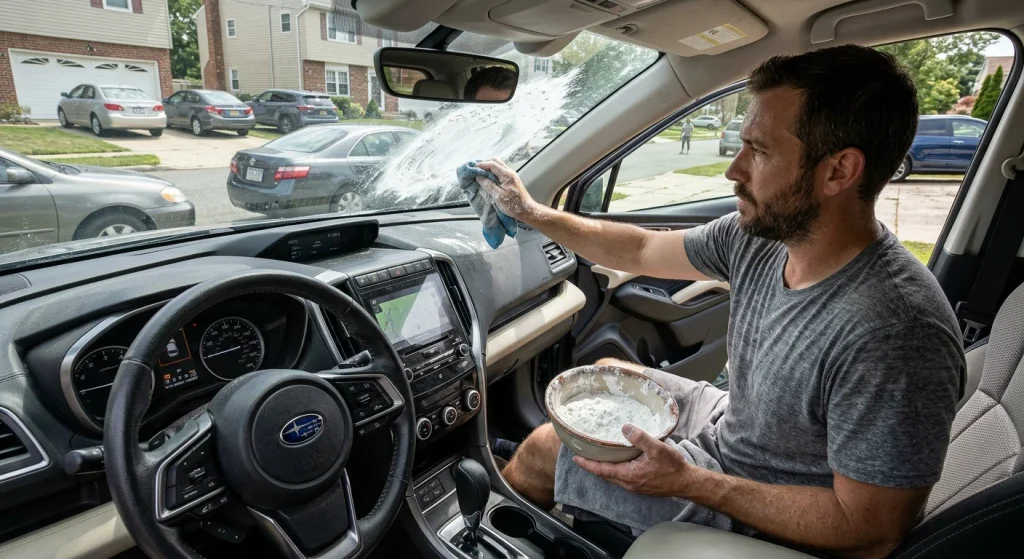
That grimy film comes from the inside of your car—plastic and vinyl release oily stuff, especially when it’s hot. The dashboard, headliner, door panels… all of them, slowly coating the glass with oil. Water-based cleaners can’t tackle it, but cornstarch acts like a gentle, non-scratching scrub that lifts and soaks up the oil. Which of these tricks to make your car look brand new will you try first?
Bonus: Use this on the outside of your windows, too. It gets rid of water spots and bug gunk that regular cleaners leave behind, and actually polishes the glass. One box will last you for loads of cleanings. Stick around for another car hack that’s sure to surprise you…
Trick #4: Clean a Dirty Fuel Cap with WD-40
Here’s a seriously underrated hack to make your car look basically fresh off the lot, and you only need about five minutes. Pop open your fuel door and check it out. Is your fuel cap nasty, stained, or maybe a bit rusty? All those years of gas drips and road junk just collect right there, and most detailers barely even bother with it unless you’re paying for the deluxe treatment. All you need is some WD-40.
How to do it: Just spray a little WD-40 right on the fuel cap and inside the filler recess. Wait about a minute—let it work its magic and loosen up the filth. Grab a stiff toothbrush and scrub, especially on the rough spots. Wipe it off with a microfiber towel. Why it works: Those stains are petroleum gunk, so you gotta fight fire with fire—a petroleum-based cleaner breaks it down easily. Water-based stuff just won’t do squat, which is why your regular car soap leaves that area looking dingy.
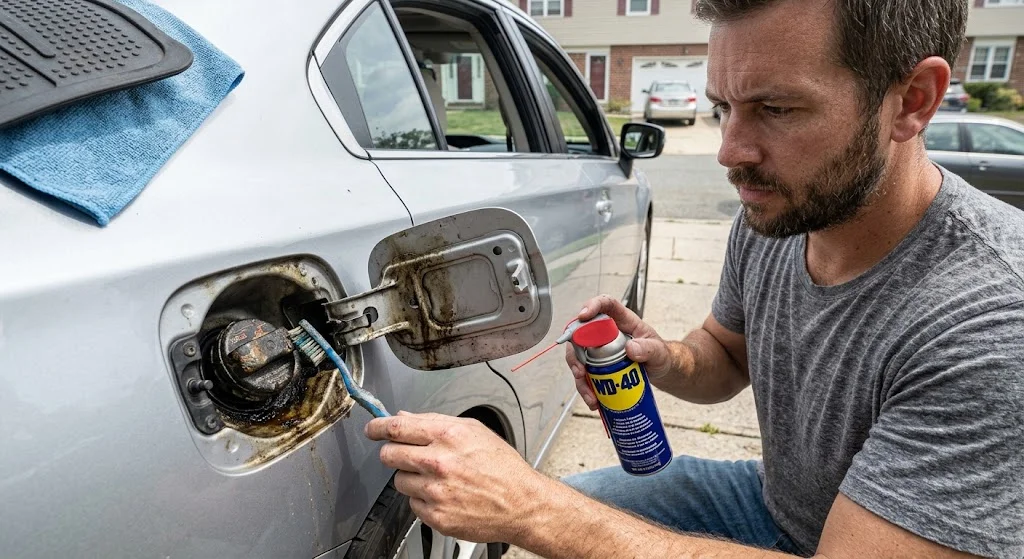
Bonus: check the seal. While you’re at it, take a peek at the rubber O-ring around your cap. If it’s dry or cracked, dab on some petroleum jelly to revive it. That little ring matters—a bad seal can trip your check engine light, and then the mechanic will happily take your cash just to tell you it was the cap all along.
Did you already know any of these car tricks?
Trick #3: Deep Clean Fabric Car Seats with Dish Soap
This is honestly one of the easiest and cheapest ways to make your car seats look brand new—no need to drop eighty bucks at a detailing shop. If your fabric seats look stained and dull, it’s probably years of sweat, food spills, and skin oil sinking into the material. You don’t need any fancy cleaner. Just grab some ordinary dish soap.
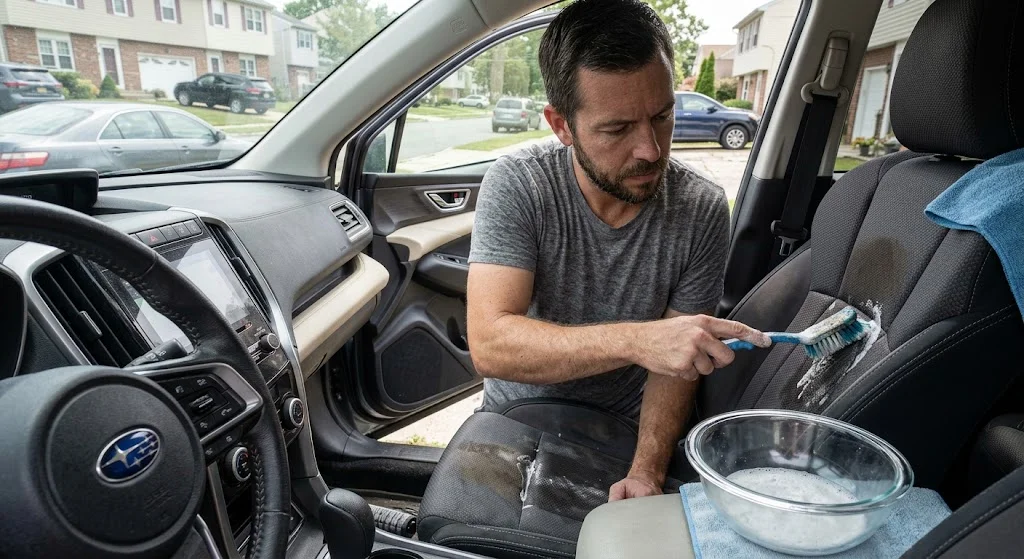
Here’s what you do: Mix a tablespoon of dish soap with two cups of warm water. Whisk it up so you get a light foam. Dip a stiff-bristled brush into the foam and start scrubbing your seat, focusing on the worst spots. Use firm, overlapping strokes. Wipe away the dirty suds with a clean, damp cloth. Keep scrubbing and wiping until your cloth stops picking up grime. Why does this actually work? Dish soap is made to break down grease and oils—exactly the stuff clogging up your seats. It cuts through the mess the same way it cleans your frying pan. Detailers use products with similar chemicals, but they slap on a fancy label and charge way more.
And if you’ve got stubborn stains? Mix in a splash of white vinegar with your soap and water before scrubbing. That combo costs less than three bucks and honestly goes toe-to-toe with a lot of pricey upholstery sprays.
How often do you clean the inside of your car?
Trick #2: Clear Hazy Side Mirrors with Isopropyl Alcohol
Here’s a simple and ridiculously effective way to make your car look like you just drove it off the lot—all for less than the cost of a cup of coffee: pick up a bottle of isopropyl alcohol from any pharmacy. Seriously, for just a couple bucks, you can tackle one of those annoying little problems that never seems to go away—grimy, hazy side mirrors.
Let’s be honest, side mirrors attract a weird kind of grime. There’s this foggy film that seems immune to water or regular glass cleaner. You wipe, and all it does is smear around and look even worse in the sunlight. If you’ve been there, I get it. The answer? Isopropyl alcohol.
Here’s how I do it: Grab a bottle of 70% or 90% isopropyl alcohol and a clean microfiber cloth (the soft kind so you don’t scratch up the mirror). Pour a little alcohol on the cloth—not much, just enough to get it damp. Wipe the entire mirror slowly, overlapping your strokes so nothing gets missed. You want to really work it in. The magic happens pretty quickly: the smear just vanishes. For a finishing touch, grab a second, dry cloth and buff it until it’s crystal clear.
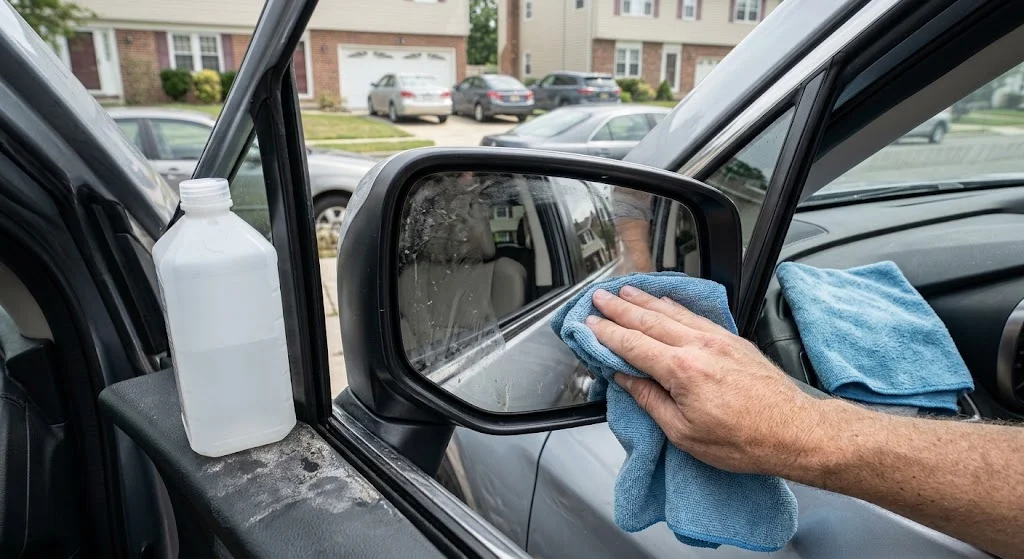
So, what’s actually happening? That gross film isn’t just regular dirt—it’s road oil, minerals from tap water, and silicone from waxing your car. Glass cleaner isn’t strong enough to cut through that stuff; it basically just moves it around. Alcohol, though, breaks it down on contact. By the time you’re done, you can see your grin in the reflection. Want to level up?
After cleaning, wipe on a little Rain-X. Don’t have any? Even a dab of shaving foam does the trick. Rub it in and buff it off. Your mirrors will actually repel rain, so you won’t have that blurry mess during a downpour—the water just beads up and rolls right off. Visibility gets a serious upgrade, especially when you’re driving at night or in bad weather,
And don’t stop at your side mirrors. Use the same bottle of isopropyl alcohol to clean your windows inside and out, along with your rearview mirror. You’ll be amazed at how much sharper everything looks, inside and out. Stick around, because coming up next is the absolute best car cleaning trick I know. If your car could talk, it’d thank you for this one.
Trick #1: Restore Faded Car Interior Plastic with Coconut Oil
Alright, here’s the grand finale—and honestly, it’s so easy you’ll wonder why you never tried it before. Plus, you probably don’t even need to run to the store because the magic potion is likely chilling in your kitchen cabinet right now. Got a dashboard or door panels that look like they’ve survived the Sahara? Dull and dried-up surfaces, blah blah blah—we’ve all seen it. The usual UV protectant sprays either make everything shiny and slippery (yuck) or they just give up after a couple of days. Skip the overpriced stuff and grab some plain coconut oil instead.
Here’s what you do: just dip the tip of a clean microfiber cloth in a tiny bit of coconut oil—really, less is more here. Next, rub it gently onto your dashboard, door panels, or whatever sad plastic surface needs some love. Use those classic smooth, circular moves. Immediately take a dry cloth and buff off any excess, so you’re left with a pretty, conditioned finish—not an oil slick from a Miami tanning salon. Want more car care tips like these?
What’s the deal here? Basically, sun and heat suck the life out of your car’s plastic bits. Coconut oil slips right in and replenishes what’s missing. You don’t get that weird, plastic-fantastic shine, either—it actually looks natural, like your car just got upgraded instead of glammed up.
Extra perk: coconut oil isn’t just for show. It gives a little extra shield against sun damage and cracking. Best part? A single jar—like five or eight bucks tops—will last you ages. If you don’t go nuts with it, your car’s interior will stay looking fresh for months without reapplying every other weekend. Not bad, right?
You don’t need to shell out for a big overhaul to make your car shine. Honestly, you just need to know a few clever hacks and use the right stuff you probably already own. Think about what’s collecting dust in your garage or tucked away in your kitchen. We just talked about silicone spray for faded trim, cornstarch to polish up your glass, WD-40 for that stubborn fuel cap, dish soap to clean up messy seats, alcohol for streak-free mirrors, and even coconut oil to bring your dashboard back to life. It all comes down to these basics.
Here’s the real magic: it’s not the price tag or a fancy detailing kit. It’s knowing what trick to pull out when your car needs a little TLC, and doing it with some care. Once you get the hang of which everyday thing tackles which nagging issue, it actually feels good to handle it yourself. No need for expensive solutions—just a little know-how, and your ride starts looking fresh again. And honestly, that’s a lot more satisfying than watching your money disappear at some auto shop.
About Me
I’m Mike, and I run Car Care Hub, where I share practical car tips for everyday drivers. No jargon, no expensive gadgets, just simple ideas that help you look after your car and keep some money in your pocket.
I started this because car care often feels more complicated and costly than it needs to be. Everything I post is based on experience / research / and I try to explain it the way I’d explain it to a friend standing next to me in the garage. Which car problem should I cover in my next post?
Want more? Find me on Car care hub, and right here on the blog. Thanks for reading, and drive safe.
Disclaimer
This post is shared for general information only and isn’t professional automotive advice. Every car is different, so results can vary with your vehicle’s make, age, materials, and condition.
Before you try anything, please keep these points in mind:
- Patch test first. Try any product on a small, hidden spot before using it more widely.
- Follow product labels. Work in a well-ventilated area and keep products away from children and pets.
- Use products only where described. Keep silicone spray and coconut oil away from tires, pedals, the steering wheel, and seats, since they make surfaces slippery. Keep alcohol off paint and plastic trim, and never spray WD-40 into the fuel tank.
- Fabric seats only. The dish soap method is not meant for leather.
- When in doubt, ask. Check your owner’s manual or a qualified professional if you’re unsure about a product on your vehicle.
You use these tips at your own risk. The author and this website aren’t responsible for any damage, loss, or injury resulting from their use.